Paver Sealer: To Seal or Not to Seal

From Outdoor Living by Belgard Blog

Outdoor living space with patio, fire pit, walls and outdoor dining located in Fishers, Indiana includes Bergerac and Weston Wall. Project designed and completed by McCune Outdoor Living. The project utilized the following Belgard products manufactured by 4D Schusters of Indiana. Bergerac – Harvest Blend with Brittany Beige Weston Wall – Harvest Blend

“Do I need to seal my pavers?” The short answer is Yes.

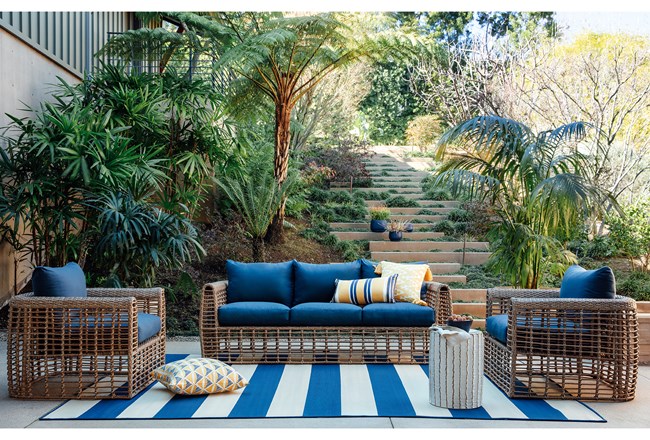
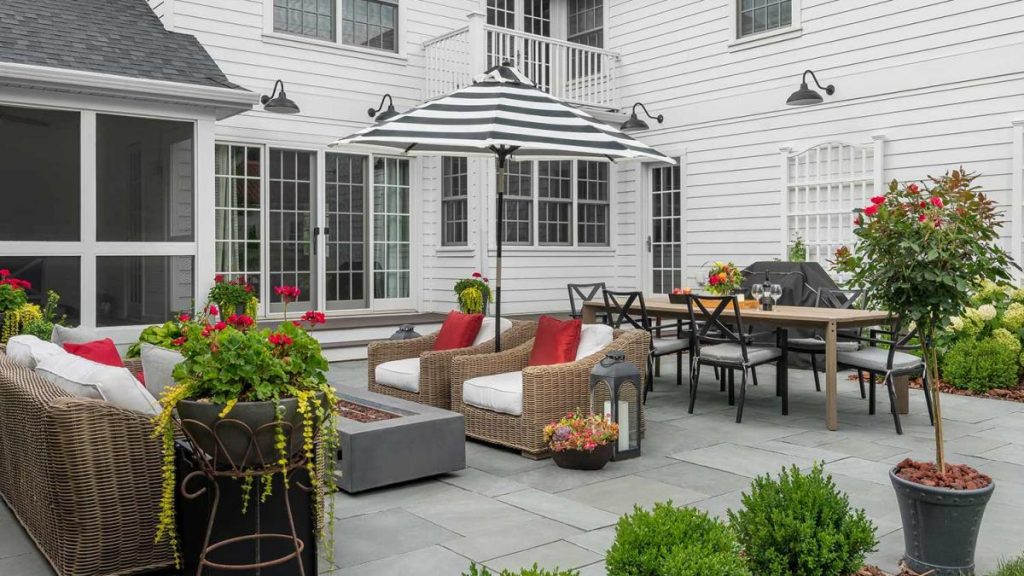
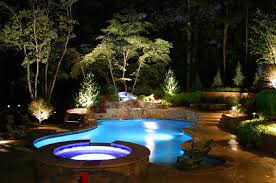
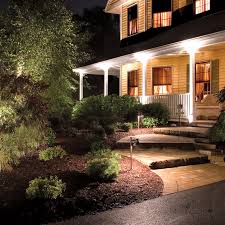
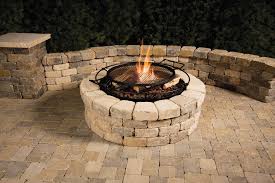
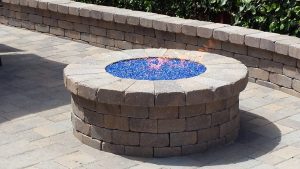
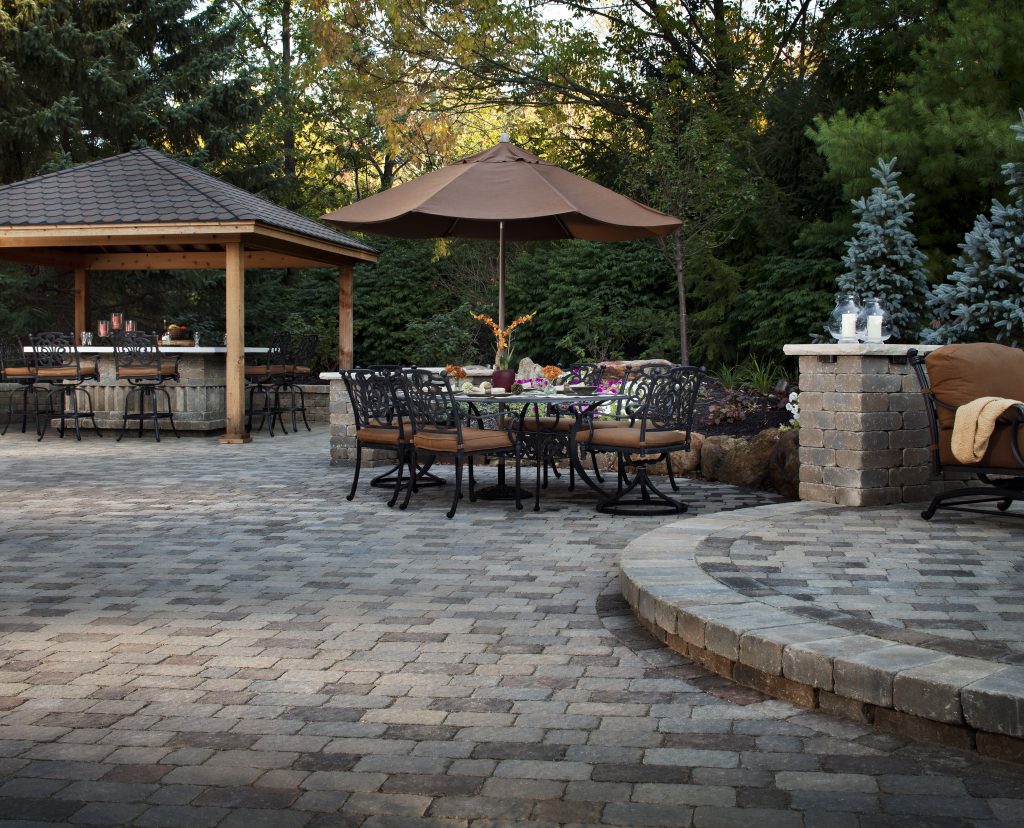
Paver sealant is an important maintenance tool to keep paver patios, walkways, driveways and pool decks looking as beautiful as they day they were installed.

However, “too much of a good thing” can come into play, and you should be wary of over-applying paver sealer by reapplying too often, which could create a haze. This week’s blog offers tips for knowing when it’s time to seal and how to best achieve the desired look.

Should all concrete pavers be sealed?

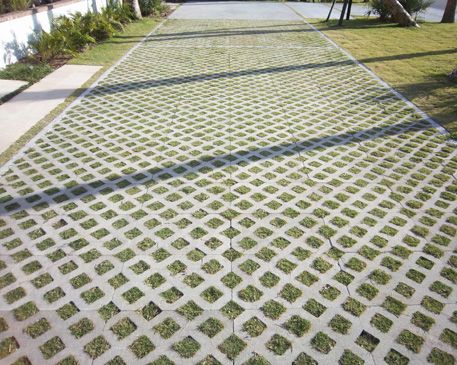
Yes. Concrete is porous and will absorb stains if not sealed. Sealants can also protect paver color from fading.

Do all paver sealant brands offer the same basic protection?

There are definitely some poor paver sealing products on the market. Don’t trust the fact that you bought it at a big box store or that it’s a high-profile brand. Just because a brand is good at one product category (like paint) doesn’t mean they are the best in another. Belgard recommends Techniseal® sealants. When it comes paver sealant, Techniseal® is a pioneer in the industry has a robust R&D department, resulting in effective and durable products specifically created for paver installation and maintenance.

Is any one paver sealant finish more protective than another?

There are basically two types of paver sealants: film-forming (gloss or semi-gloss finish) and non-film-forming (matte finish). Film-forming sealants, such as Wet Look and Clear Look, offer the ultimate protection because they create a physical barrier on the paver surface. However non-film-forming sealants, Natural Look  and  Color Boost , still offer excellent protection and l ast a bit longer.

Techniseal Concrete Paver Sealer

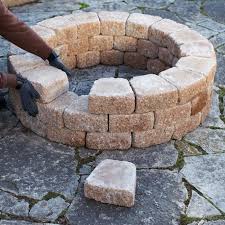
How long should new pavers cure before they are sealed for the first time?

If using a non-film-forming paver sealant, wait one week before sealing. If using a film-forming sealant, wait 30 days to avoid trapping moisture under the protective barrier.

Is there a prep process before applying paver sealant?

Even new pavers should be cleaned with Techniseal® Paver Prep prior to sealing. Not only will it clean the pavers, but it will open the pores on the surface to allow better penetration of the sealant. Older pavers will also benefit, as Paver Prep will remove any efflorescence (or whitish salt buildup) that has accumulated. Any stains should be removed prior to applying Paver Prep, using the specific stain remover for the type of stain. For more information, read last week’s blog on paver stain removal.

How long should pavers dry after being cleaned and prepped?

The answer depends on your climate. In warm, sunny climates, the pavers will be dry and ready to seal in a few hours. In cooler climates or shady areas, it’s best to wait about 24 hours.

What are the ideal weather conditions for sealing?

Ideal conditions would be 75 degrees and sunny; however, anywhere between 50-90 degrees is generally fine. Take note that solvent-based sealants evaporate faster, so lower temperatures are better for application.

How often should paver sealer be reapplied?

The basic rule of thumb is every 3-5 years. For film-forming sealants, you will be able to notice when the physical barrier is showing signs of wear. For non-film-forming sealants, you will begin to see a significant color change of pavers during a rain when the sealant is wearing thin. Keep in mind that in cases of a really heavy rain, even well-sealed pavers may darken for a couple of days until the water fully evaporates, which is not an indication of sealant failure.

PAVER SEALING APPLICATION TIPS:

  • Like with painting, it’s best to keep a wet edge on a continuous area. In other words, don’t let a section dry before you finish. Once you start working, keep working.
  • An application sprayer (available at any hardware store) makes it easier to work faster.
  • Apply paver sealant to saturation. Get the pavers good and wet to make sure all crevices are covered. Then use a dry roller to soak up the excess to avoid lines and drip marks.
  • Always follow the manufacturer’s instructions.
  • Visit Techniseal’s website for more DIY paver sealant application tips. When in doubt, hire a professional. To find qualified contractors in your area, visit the Belgard contractor locator.

Top Landscape Trends For 2020

The National Association of Landscape Professionals (NALP) has announced its official list of the top lawn and landscape trends for 2020. Crafted using the expertise of professionals across the country, NALP annually predicts design and maintenance trends that will inspire Americans to create healthy and beautiful green spaces.

“Foundational landscape elements remain on homeowners’ wish lists, but modern updates and technology are now a top priority. With a wave of design and technical innovations, our members report that ornate hardscaping, contemporary features, lush gardens, and smart irrigation are all trending and will influence landscape designs across the country in 2020,” says Britt Wood, CEO, National Association of Landscape Professionals. “This year’s trends showcase how homeowners of all generations desire a striking, custom and well-maintained outdoor space that benefits their community and the environment.”

The Five landscape trends that will define outdoor spaces this year:

Ornate, Geometric Hardscaping: 

Professionals are noting an uptick in requests for intricate hardscaping patterns including waves, chevron, lattice, and basket weave to sweep the country. From walkways and patios made out of flagstone or pavers to retaining walls and fire features, homeowners are looking to integrate popular home décor patterns into their hardscape designs.

Contemporary and Transitional Landscape Design: 

Boomers, gen Xers and millennials are seeking sleek, contemporary and simple landscape designs. Whether opting for an elegant outdoor kitchen, contemporary sculpture, or modern fire or water feature, professionals are seeing a shift towards simplistic designs. Multi-season functionality is essential as more homeowners are selecting elements that can survive a range of temperatures, such as native plants, heat lamps, and protective structures.

Bountiful Shades of Blue: 

Landscape professionals anticipate rich tones of blue to make a striking impact in 2020. With PPG naming Chinese Porcelain, a cobalt and moody blue, and Sherwin-Williams declaring Naval, a strong and calming dark blue, as their respective colors of the year, experts predict these tones will influence the design of outdoor spaces this year. To add touches of the hue, homeowners could consider a blue sculpture or water feature. To incorporate shades of blue into gardens, look to plants such as blue fortune, delphinium, hydrangea, globe thistle or grape hyacinth.

Your Style, Your Garden Design: 

Gardens serve as a relaxing escape for many across the country. From creating edible gardens for farm-to-table dining to planting gardens that produce favorite fruits, vegetables or herbs, homeowners are more aware of the options that exist for installing gardens that meet their personal needs. For smaller spaces, consider container gardens, vertical gardens and interiorscaping to create an outdoor garden oasis.

One-click, Remote Irrigation: 

Technology continues to be a staple of the lawn and landscape industry. In 2020, homeowner demand will contribute to a rise in high-tech irrigation systems that deliver just the right amount of water to a lawn or landscape, conserving water and saving money in the long run. The latest irrigation systems are controllable from anywhere with Wi-Fi, Bluetooth, and smartphone apps or your Alexa or Google smart speaker to help maximize efficiency.

NALP develops its annual trends report based on member surveys and the expertise of landscape professionals from around the country. Along with industry insight, NALP trends are influenced by popular lifestyle shifts and designs, and reflect Americans’ growing passion for healthy, well-designed green spaces.

Benefits of Landscape Lighting


One of the best ways to create a great aesthetic vision on your property is to utilize landscape lighting outside your home. Not only is this a great way to decorate your front yard area, it is also an effective safety measure that can keep intruders away from your house.

However, there is always a question of which type of lighting works best: LED or halogen.

There are pros and cons for both, and it is worth exploring them in detail so that you can make the best decision as to which one is more appropriate for your landscape lighting project.

Halogen Landscape Lighting Pros

A major benefit of halogen lights is that they are cheap. In fact, they are cheaper than LED lights, which means you can spend far less money on many of them when you are using landscaping lighting on your property.

Depending on the brand and wattage as well as the size of bulbs you purchase, you can expect to spend anywhere from $4 to $10 per bulb.

The quality of lighting of halogen bulbs is generally considered very good. This means that they are great for landscape lighting.

You should experience a good amount of brightness for your property, which is both good for aesthetics and safety. Halogen lights are also capable of being used with a timer. This means you can use them in your landscape and have the timer tell them exactly when they should light up or turn off.

In particular, low voltage halogen lights are good options when you are looking to save energy with your landscape lighting. They are generally low on energy, although they are not inordinately so.

You can expect to save around 20 percent on your energy bills overall when using halogen lights for landscaping.

In general, you can place your halogen lights anywhere, whether high or low. This means you have a lot more flexibility with your landscape lighting when you rely on halogen.

Halogen Landscape Lighting Cons

Unfortunately, in spite of the cheap cost of halogen lights, they do not last very long when compared with other types of lighting.

This type of landscape lighting will actually end up costing you more in the long run due to the fact that they only last from 2,000 to 5,000 hours total. What this means is that you will have to replace them more often, which can add up over time.

The costs for wiring halogen lights can also be pricey. You may shell out more money for the fixtures and other parts just to get the lights running.

Maintaining halogen lighting might end up being more trouble than it’s worth in the long run, especially when you have 100 or more bulbs in your landscape lighting setup.

Additionally, you must keep halogen light bulbs that are working off of the same system positioned at an equal distance from the transformer. This is necessary for the sake of consistency and can be a burden over time.

LED Landscape Lighting Pros

Although LED lights are more expensive to buy, in the long run, they are worth it. This is because they have a much longer life than halogen bulbs at anywhere from 30,000 to 50,000 hours. You can rest assured that your landscape lighting will burn bright for much longer than one year. You can expect to get at least a good 10 years out of your LED lights, depending on use.

Like halogen lights, the lighting ability of LED lights is very good. You will get great quality out of your landscape lighting when you use LEDs.

Maintenance costs are much less frequently needed and end up being less money with LED lighting. You will not have to do much in that regard, and this type of lighting is much more energy efficient.

In fact, you can save up to 80 percent of your typical energy costs when you use LED lights for your landscape lighting.

LED Landscape Lighting Cons

Initially, LED lights really can be expensive for the average homeowner. Depending on the type of bulb and its wattage, you can expect to shell out anywhere from $20 to nearly $100 per bulb.

If you choose LED lights to use in your landscape lighting, it is recommended that you place their fixtures higher up in a place that is difficult to reach.

This is largely due to the fact that it will allow you to save costs on maintenance. LED is much more easily damaged when placed in lower areas.

 
LED vs. Halogen Landscape Lighting

Overall, you will benefit more from using LED lights for your landscaping due to the fact that it is less expensive to maintain and gives you more flexibility in your designs.

Although halogen lights are far cheaper to buy, they won’t last anywhere near as long and you will find it pricier to have to maintain them over time. LED lighting also has the edge due to their greater efficiency, which means you will save a lot more – up to 80 percent – on your energy bills.

Halogen lights are generally better if you want more flexibility with the design of your landscape lighting.

 
Great Landscape Lighting Ideas

After you have an idea of which type of lighting you prefer to use, you will want to begin thinking about what type of landscape lighting design to use.

Of course, there are many different ways you can go about bringing your landscaping lighting ideas to life. It’s best to talk with a landscape lighting contractor for help with the design and installation of your lighting.

If you have a lovely walkway in front of your house that leads up to your front door, you can have a little fun with it. If you are like a lot of other homeowners, you probably have plants creating a fashionable walkway to your home, such as shrubs. Consider winding some small bulbs in the plants so that you have an area that it lit up and draws attention to your landscape.

You can do something somewhat similar with your landscape lighting if you have a stone walkway that leads to your front door. This is a great design idea whether you have steps or not. Place your lights on either side of the stone walkway so that they create a line that leads right up to your doorway.

For many homeowners, incorporating an outdoor pond in the front of their house or even a backyard waterfall is one of the most beautiful ways to utilize landscape design.

You can take that a step farther by adding gorgeous lighting to these areas. Place lights inside your pond or as a decorative border around it to really enhance your outdoor living space.

A common trend among homeowners is incorporating beautiful landscape lighting ideas into the garden.

For instance, if you have some flowering plants in a distinctive pattern along your property, whether in your garden or front yard, you can use lighting fixtures inside of stakes to hold the plants in place in the soil. This type of landscape lighting serves a dual purpose of lighting a path along the area as well as keeping the plants affixed so that they can thrive and blossom.

It may seem odd, but an uneven and irregular setup with your landscape lighting can really work well in some settings.

Instead of following a regular pattern of lighting up a path on your property, consider placing lights in a more irregular manner so that random areas are lit up.


It will probably surprise you that they will look even more beautiful than if they were arranged in any particular way. Moon lighting is an absolutely gorgeous way to play with lights in your landscape.

You can light up a good deal of your property by placing lights very high up in the trees. As a result, you will find that your home will have more of a woodsy feel and will appear to be spotlighted. One thing to keep in mind with this type of landscape lighting, however, is that you will have to get the lights at least a good 30 to 40 feet up in the trees. It’s best to hire a landscape lighting company to help. Consider this design method to create a dreamy effect. It works well if you have a body of water on your property or simply a stone walkway.

If you have a patio or terrace, you can light it up beautifully by placing your landscape lighting high up in surrounding trees. This is an excellent way to light up the area at night and sit with family or friends without having to be bothered by harsh lighting. You can even use bulbs that are of a different color for an even cooler effect.

This method will make it seem as though the lighting is more indirect, which makes for a more soothing experience while out on the patio or terrace. It is referred to as “indirect lighting.”

Once you’ve decided the landscape lighting design you would like to use in your yard, be sure come by any of our stores and see our display by Corona Lighting!


3 Types of Landscape Edging


If your garden needs a boost, perhaps it’s time to rethink your edges. Installing new edging is one of the easiest, fastest ways to improve the overall appearance of your garden. Whether you want to dress up a swath of perennials, draw attention to a bench in the distance, or simply keep gravel contained, freshening up your edges often does the trick.

You can install some materials, such as metal or composite bender board, in an afternoon. Others, such as poured in place concrete and boulders, require a weekend or longer to complete and may challenge you to learn some new skills.

Edging materials provide a stable framework for walkways and patios, while creating a contrast between two distinct areas. Visually it provides a crisp, clean manicured look, while physically creating a functional separation. Landscape edging can be applied to the lawn perimeter, bed edges and borders — anywhere hardscape materials, plants and grass spill over where they shouldn’t.


Here are 3 common types of edging:

1. Masonry

Concrete, brick and stone provide a solid edging in a variety of colors, shapes and sizes. Upright soldiers, a common name for bricks that are stood on end, rest on a porous base for proper draining. When bricks are tilted, the design is called tilted soldiers. The bricks are tilted against each other, then back-filled with sand and tamped down. Another long-lasting edging material is concrete, which provides a neat, clean and durable edge, particularly for high-traffic areas. If the edging is made wide enough, it can double as a mow strip.

Brick edging

Concrete Paver Edging

Stone edging

Concrete edging

2. Strip Edging

Strip edging made of steel, aluminum or plastic is held in place with metal or plastic stakes and works well for curves and shapes. This type of edging is less work intensive than most other materials, as the edging can be hammered into place, no trenching required. Plastic edging is generally the weakest and may crack and lose its shape over time. It has a tendency to wiggle under pressure or when the ground is wet and the hardscape beside it is unstable, such as gravel or river rock.

Aluminum edging

Rubber edging

Composite Bender Board

3. Wood Edging

Wood edging includes railroad and landscaping timbers, pressure-treated and composite products that provide a strong, long-lasting edging, but require a little ground work for installation. For added strength, wood edging is often braced with 16-inch spikes which hold up even under the toughest weather conditions; it won’t crack, break or wiggle if properly installed. Cedar, cypress and redwood naturally resist rot, while other types of wood need to be chemically treated.

Railroad Ties

Treated Timbers

Wood Bender Board

Landscaping Trends: Permeable Pavers

An excellent option for homeowners concerned with sustainability and water conservation are permeable pavers.  Permeable pavers allow water to pass through small openings and re-enter the ground water. There are a variety of permeable materials that offer the best of both worlds: a porous patio or driveway surface that is also very attractive.

Permeable Paver Benefits:

  • Manage storm-water
  • Prevent runoff and pollution
  • Replenish the groundwater supply
  • Many unique permeable design options

Permeable paving is not a new concept – hundreds, possibly even thousands of years ago, people were making roads and paths by setting stones in sand. Many of these ancient creations have survived to present day, proving that permeable pavements are strong and durable. However, during the 20th Century’s rapid development impervious pavements became the norm.

With the recent push towards sustainability and the concern over the water supply eco-minded people have begun to challenge this norm. Many homeowners are looking to create sustainable landscapes and permeable paving helps achieve that goal. In fact as an incentive, many cities, especially here in California, are offering sustainable landscaping rebates. As we hear about water shortages and increased levels of pollution, the benefits of installing a patio, path or driveway that allows rainwater to filter through to the earth below are very appealing.

Paving stones are very popular landscaping elements. They are versatile and can be used in almost any outdoor setting. You can choose between stone, brick and concrete pavers and they all are strong and durable too.

Today, people are becoming very environment conscious and when they get any home improvement or landscaping work done; they look for environment friendly solutions that will also benefit their landscaping. In this respect permeable pavers are an excellent option.

What Are They?

  • They are made from a mix of sustainable building materials
  • They have a base & a sub-base, both of which allow runoff water to seep through into the ground underneath
  • When you use only normal pavers or have concrete outdoor flooring, the water is unable to seep through and it just gets diverted towards the storm water drains which is nothing but a waste of water
  • Contrastingly, this porous paving permits rain water and the water that you hose onto it, into the ground
  • This helps replenish the levels of ground water
  • These paving stones also filter the dust and pollutants from the water and there is no contamination of the groundwater
  • Today, these installations are becoming popular on residential and commercial properties

Who do we sell?

Every major paver manufacturer makes a line of permeable pavers.  We work with:


Landscape Trends: Xeriscape

Although it hasn’t stopped raining in what seems like months, for the past few years California has been experiencing severe drought.  So much so that it has changed the way we think about building our homes, buying our appliances, designing our back yards and arranging our landscaping.

This has led to a new trend in landscape design known as “Xeriscaping”.

What is xeriscape? The word is derived from the Greek “xero” meaning dry and “scape” meaning view or scene. Basically, xeriscaping is a landscaping philosophy that uses as many native, drought-resistant plants as possible and arranges them in efficient, water-saving ways.

Those who have never heard the name may already know its techniques, because its principles are commonly used in landscaping and often work well. Some people who are aware of the concept mistakenly refer to it as “zero-scape,” as in the use of no water. Others have a negative perception of xeriscaping, thinking that the practice involves the use of barren, rocky landscapes and a few cacti.

As it turns out, xeriscaping doesn’t have to mean a bunch of tumbleweed from the southwest, because it’s open to the use of native plants, a landscaper can select a myriad of plant varieties from his region. A xeriscaped lawn can look as attractive and colorful as a regular one. If used effectively, xeriscaping can reduce water use for landscapes by 60 percent or more.

Let’s talk about a few practices that can help you create an effective and beautiful xeriscape:

1.  Create practical turf areas:

Xeriscaping does not necisarily mean eliminating all sod or grass and replaceing it with gravel. You just need to take into account where grass will be useful and enhance the landscape, not take away (both physically and visually) from the other plant life.

There are also many different types of grasses, some of which are seasonal, some of which are native to a certain region and work better with low water usage. You can check with your local gardening center to see which kind of grass is best suited for your landscape.

2.  Select the right plants:

Choosing the right plants is probably the most important part of xeriscaping. These plants will be the main attraction and define your landscape. But the location and grouping of plants can greatly affect the amount of water you will use in the long run.

Native plants are usually the best choice for a xeriscaping project.  The use of ornamental grasses, succulents and cacti or aloes, as well as vertica plants which are native to California are best.

Although it’s possible to use plants from other regions, there’s a chance that outside vegetation won’t adapt quickly to a new locale, and you’ll be stuck with an empty lawn. It’s also important, of course, that the plants are drought-tolerant and don’t require much water.

3.  Watering and the right irrigation:

It’s important to know how much water is needed for plants. Some plants can rely on the limited rainwater a region might receive during a drought, but many still need water maintenance, even if it’s just a little.

You can provide plants with efficient irrigation with either a hose-end sprinkler or drip irrigation system. We work with both Rainbird and NDS for our drip irrigation products.

It’s important to keep water as low to the ground as possible to avoid spreading it toward unnecessary locations and causing evaporation.

4.  Use of mulches:

Important for keeping roots cool and minimizing water evaporation, mulch is available in two types: organic and inorganic.

Organic mulch is wood-based, including bark mulch, wood chips and natural wood shavings. Although this type needs to be replaced regularly to keep away rot, wood-based mulch keeps landscapes cool and adds good, complementary color.

Inorganic mulch, on the other hand, is stone-based, such as decomposed granite, gravels, or lava rock. Stones don’t need to be replaced, but they work best in the shade, since otherwise they’ll soak up any heat from the sun and evaporate much-needed moisture.


I hope this will inspire you to prepare for the next big drought. Even though we’ve had record rainfalls…undoubtedly, we will see other dry seasons come.


DIY Projects: Left Over Pallets


I get a few calls a week from customers asking me: “what can I do with these left over wooden pallets we got from you?”

The simple answer is to throw them away or bring them back to us and we can always reuse them.

But the fun and creative answer for those of you with a little bit of skill and since of adventure is turn those pallets into a fun DIY project.

If you look online or on Pinterest, you’ll see tons of creative uses for these pallets.

First, determine what type of pallet you have.  Then it will be easier to figure out a good use for them.


Once you’ve established the type, you can get to work dismantling and reassembling them. All you need is a hammer, some paint and nails, construction adhesive and an imagination.

Here are a few of my favorites:


                                                Pallet bench

                                            Pallet desk

                                             Pallet planter

                                   Pallet Shelf

                                           Pallet swing

                                     Pallet work bench

Backyard Trends: Gabions


Since selling stone is our primary business, I am always looking for great ways to display them, whether its flagstone, gravel or boulders and cobbles.  One of the most beautiful ways of displaying boulders and cobbles are Gabions.

For those who don’t know, gabions are a traditional retaining wall system comprised of steel mesh ‘baskets’ filled with rocks.    In landscaping, gabion walls can support an earth wall, stabilize the soil, prevent erosion, and more.

Gabions are nothing new.  They have been used in engineering through out history, from ancient Egypt to medieval Italy. Derived from an old Italian word, gabbione, meaning “big cage.” The cages were originally wicker, but now are usually a welded mesh made of sturdy galvanized, coated, or stainless steel wire that won’t bend when filled with rocks.

What are the benefits of gabion walls?

History has shown that gabions are a lasting solution to soil erosion as well as hillside retention. Other reasons to use them:

  • Aesthetics: Gabions look natural and can tie a house to the landscape by using filler materials excavated from the site or the local terrain.
  • Environmental friendliness: When onsite material is used as filler, transportation costs and associated fuel consumption are eliminated.
  • Sustainability: Used as shade screens in hot climates, gabion walls provide passive cooling; they allow air to move through, providing ventilation.
  • Permeability: Gabions are permeable and free-draining; they can’t be washed away by moving water.
  • Easy installation and built-in strength: The stone fill settles to the contours of the ground beneath it and has such frictional strength that no foundation is required. In fact, the wall’s strength and effectiveness may increase with time, as silt and vegetation fill the voids and reinforce the structure. Another advantage over more rigid structures: Gabions can conform to ground movement.
  • Long-lasting.

Gabions can serve many purposes other than building walls.  They are used for small fences, benches, posts, planter boxes, even barbeque pits or grills and more.  Here are a few cool ones I’ve seen:

Stone is not the only material used to fill gabions.  You can use reclaimed brick or roof tiles, broken concrete, broken glass, wood or branches or anything else you can imagine…but the heavier the material the better it will serve for retaining walls.


DIY Projects: Left Over Cinder Block

I’ve been asked by more than one customer: “what can I do with all those left over cinder block we bought for our wall?” ( as well as brick, or flagstone, or pallets, but we’ll cover those in other posts).

Aside from returning them to one of our 4 locations or paying for a dumpster or someone to haul them to the local waste management site, why not use them in a fun and creative DIY project.

Other than the cinder block, you might need a few other items:  2×4’s, some mortar or block adhesive and paint, and we can take those construction leftovers and make something cool to spruce up the yard.

Here are a few ideas:

Back yard bench

Steps in your garden

Book shelves

Back yard seating area


Candle or art display


Fire pit

Hopefully you can get some ideas from these pictures, and please feel free to share your finished products with us here.


Backyard Trends: Fire Pits


Let’s talk about Trends for 2017.  Talking to contractor clients, landscape architect and designers, we are seeing that home owners are looking for Complete Outdoor Living Areas.  Although this isn’t a completely new fad, more people are looking to add value to their homes while at the same time extending living or entertaining spaces to the back yard.

These outdoor living areas can range from whole outdoor kitchens and entertainment centers, to a barbecue or poolside bar area.  And can run you upwards of $50,000 or more.

Do you have an area of the back yard that you’ve been contemplating turning into an Outdoor Living Space?

Want to build a comfortable seating area, that will serve as a great place to entertain?

Why not build a fire pit?

If you take on this project yourself, you could spend closer to $500 if you have the patience and are willing to use some elbow grease. Building a fire pit can be an easy project, whether you are a weekend DIYer or this is the one and only time you’ll ever work in the back yard, we are confident you can get it done!

For our first blog post we will show you how to put a fire pit together.  I don’t have any photos of the process, but I will show you a few different prefabricated fire pit options from local suppliers, including Belgard, Olsen, Orco and Angelus Pavers.

HOW TO BUILD A FIREPIT

Materials used:

  • Pick your block.  There are a lot of options when it comes to fire pit blocks. Here are a few of the brands and styles we work with:

Angelus Planter Wall Blocks

Belgard Country Manor Fire Pit Kit

Belgard Weston Fire Pit Kit

Olsen Infinity Fire Pit Kit

Orco Keystone Country Manor

Orco Jumbo Nursery Stone

Instructions.
1.  Check on your city and local codes and restrictions to find out what is required for a fire pit.
2.  Chose an open spot, 10 to 20 feet away from trees, bushes, grass and other flammable items.
3.  If building in none paved area, use rake and or shovel to clear out grass and debris and smooth out fire pit area. If on paved area, just make sure the area is clean and hopefully leveled.
4. By now you have already picked the shape of your pit.  If you plan to create a circular pit, you might want to mark out the area first using a measuring tape and marking the ground with spray paint.  (Have someone stand in the center of the fire pit area with the end of a measuring tape and the 2nd person can walk around at the desired measurement and mark the ground in a circle.)
5. Lay out your first layer of retaining wall bock directly on the ground.
6.  Dig out about 4 to 6 inches of dirt from inside the fire pit circle.  (You may need to dig out more or less depending on your local code.)
7.  Stack the second and third layer of retaining wall block.  Fill the bottom of the fire pit with  4 to 6 inches of decomposed granite, sand or pea gravel. Use a brush to clean debris from the surface of the previous layer. Overlap the layers of stone, leaving three or four random gaps between stones in every course. The gaps allow the fire to draw air into itself. We dry-stacked the stone. They may get out of alignment, but realignment is easy.
8.  Add the 4th row of retaining wall block.  You may chose to glue the 4th row to the third row with landscape retaining wall adhesive.  If you do this, just follow the directions for the adhesive.
9.  If creating a seating area, add the rest of your gravel, back filling around the fire pit.  Smooth out, add chairs, outdoor string lights and enjoy!